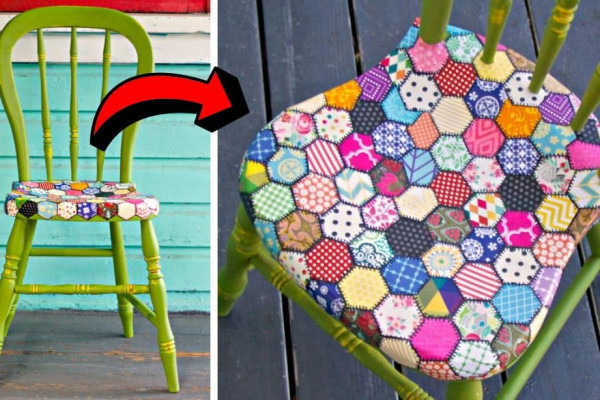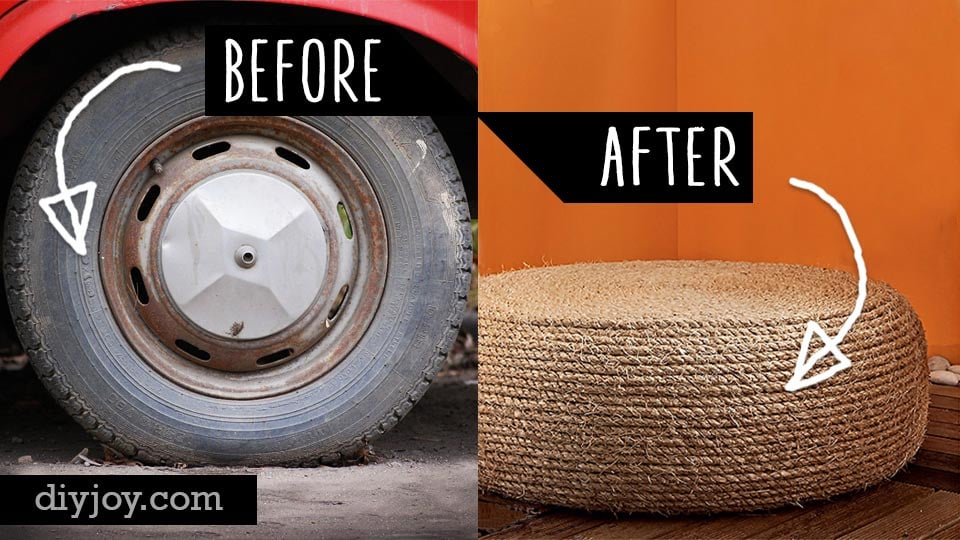
One of the best things about being a creative DIYer is taking something old and making it into something new. Perhaps it is no surprise then that some of my favorite pieces of furniture started out as something else. Over the years, I have seen quite a few cool DIY projects where other people converted unexpected things into furniture. Some of them are so cool and unbelievable that I just had to share them with you.
From improvised shelving and seating to lamps and outdoor benches, these DIY furniture hacks are indeed impressive. Check out the before and after photos to see what I mean. You may already have some of these pieces laying around, but if not, they can be picked up cheap at garage sales or thrift stores. Repurpose and upcycle things like this and make some awesome do it yourself home decor today!
Table of Contents
- Cool DIY Furniture Makeover Ideas
- 1. DIY Kitchen Stand From Old Cabinet
- 2. DIY Headboard From Door
- 3. Repurposed Dresser Bench
- 4. Foot Rest from Old Drawers
- 5. Bi Fold Closet Door Bookshelf
- 6. Entertainment Center into a TV Console Table
- 7. Trash to Treasure Curb Side TV Transformation
- 9. Ladder Towel Rack
- 10. Old Unused Vase into an Adorable Table Lamp
- 11. Wooden Stool into a Tool and Crafts Organizer
- 12. Rustic Cooler Box from Pallets
- 13. Bed Turned Into Bench
- 14. Old Kitchen Chairs Hack
- 15. Unused Old Dresser Turned Bench
- 16. An Old Door into A Life Story
- 19. Dresser Flip
- 20. Potting Bench Turned Outdoor Bar
- 21. Upcycled Side Table into Planter
- 22. Grand Piano Bookshelf
- 23. Step Ladder Side Table
- 24. Night Stands from a Desk
- 25. Padded Bench Out of Bookshelf
- 26. Crib into Toddler Loft Bed
- 28. Repurposed Cot
- 29. File Cabinet into a Garage Storage Favorite
- 30. French Style Bench From Old Chairs
- 31. Dresser into A Vanity
- 32. Bunk Bed to Coat Rack Awesome Hack
- 33. Old Crib To Plate Holder
- 34. Old Crib Spring to Wall Memo Board
- 35. Hanging Chair Closet Organizer
- 36. An Old Table into Kids Lego Table
- 37. From Coffee Table to Ottoman
- 38. Artwork Display for Children using Cabinet Doors
Cool DIY Furniture Makeover Ideas
1. DIY Kitchen Stand From Old Cabinet
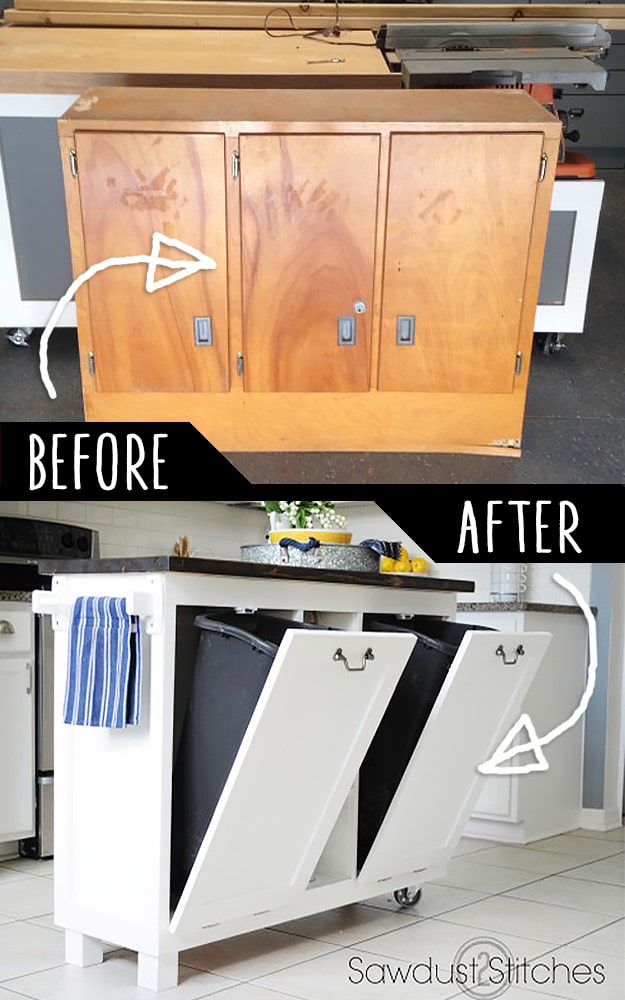
Can you believe this old cabinet could be made to look so amazing as a DIY kitchen island? The creative DIY project should be one of the more rewarding things to try. Be sure to take your own before and after pictures when you try this DIY hack with a piece of old office furniture I picked up both of these cabinets at a garage sale for $5.00! They weren’t in perfect shape, but they were made of decent wood, and I knew I would have definitely spent more to make them from scratch. It really was a no-brainer for me. This was a play-it-by-ear sort of project. I dove in with reckless abandon. I just started ripping that sucker apart. I built little cubbies and put a marble top on it. You would not believe the compliments I get on it.
2. DIY Headboard From Door
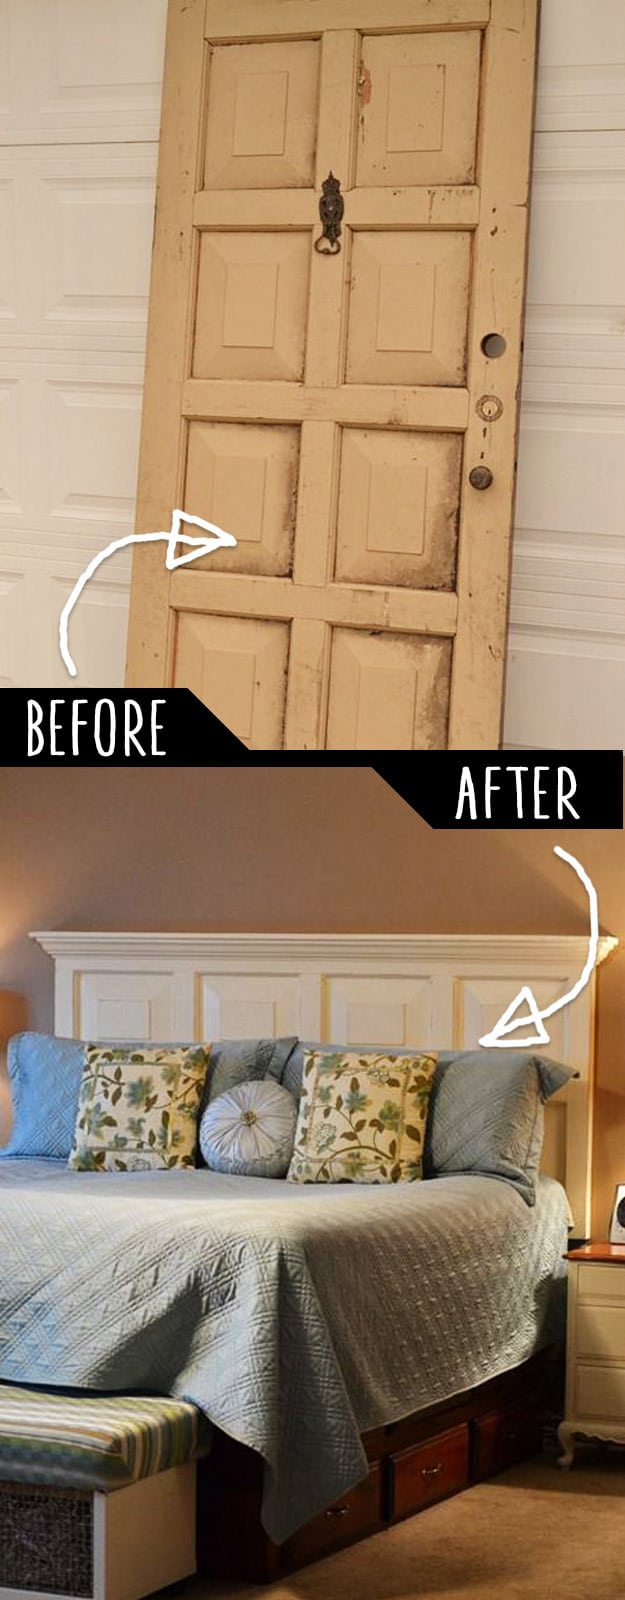
Old doors are some of the best things to upcycle since you can do so many different things with them. I have seen DIY coffee tables, desks, and now found this awesome do it yourself headboard. Looks like it came from a designer furniture store, doesn’t it? t was crazy how it happened but, a few weeks back, on our date night, we spotted an old wooden door curbside. The supportive husband that Tim is, he stopped to feed my Roadkill Rescue addiction curiosity. The door was solid wood and luckily my man was with me to heave it into our van. I had immediately had visions of turning the old door into a headboard for our bedroom.
Home Decor Hacks Make For Inexpensive DIY Decor!
3. Repurposed Dresser Bench
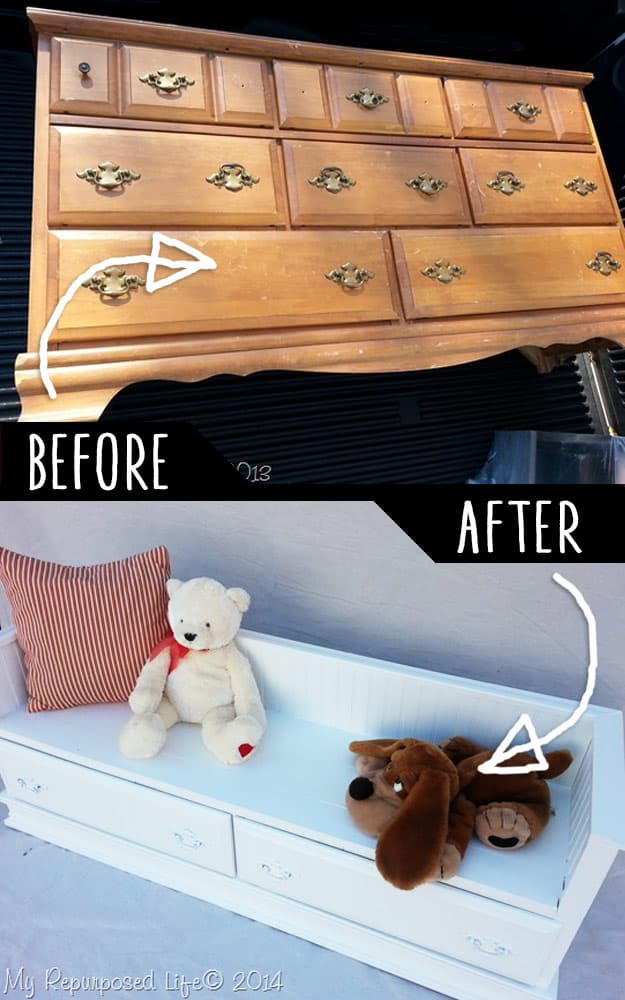
I bought this dresser ($20) and two pieces of the beadboard paneling for $4 each. I know, $20 is way over my $5 limit….more about that in a minute. I already knew that I wanted to repurpose it into a bench because I did one years ago, and I’ve been wanting to do it again. It was kind of small and cute so I used it in my Daughter’s room and it looked super!
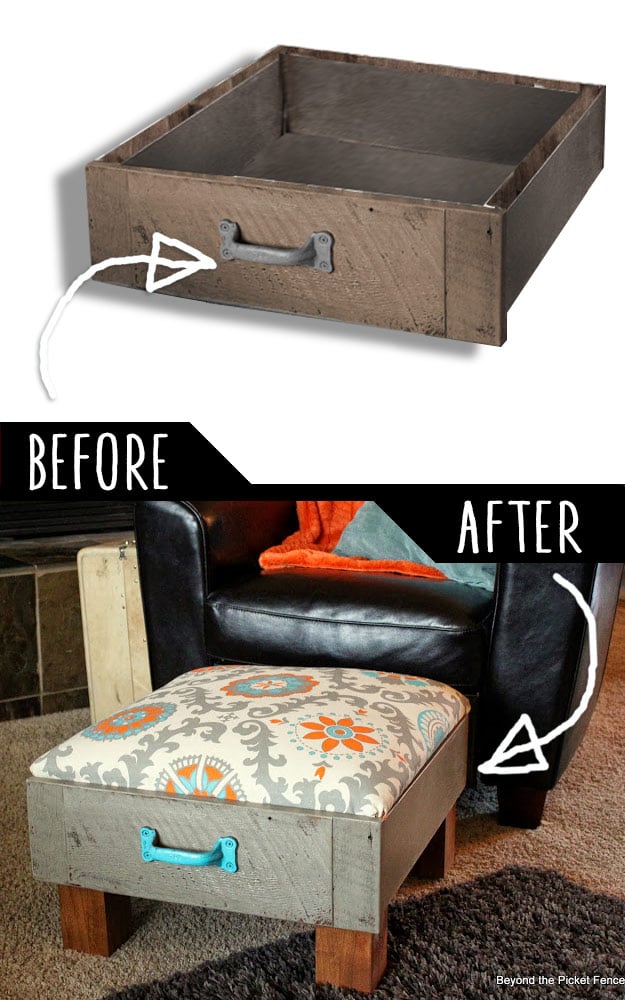
4. Foot Rest from Old Drawers
5. Bi Fold Closet Door Bookshelf
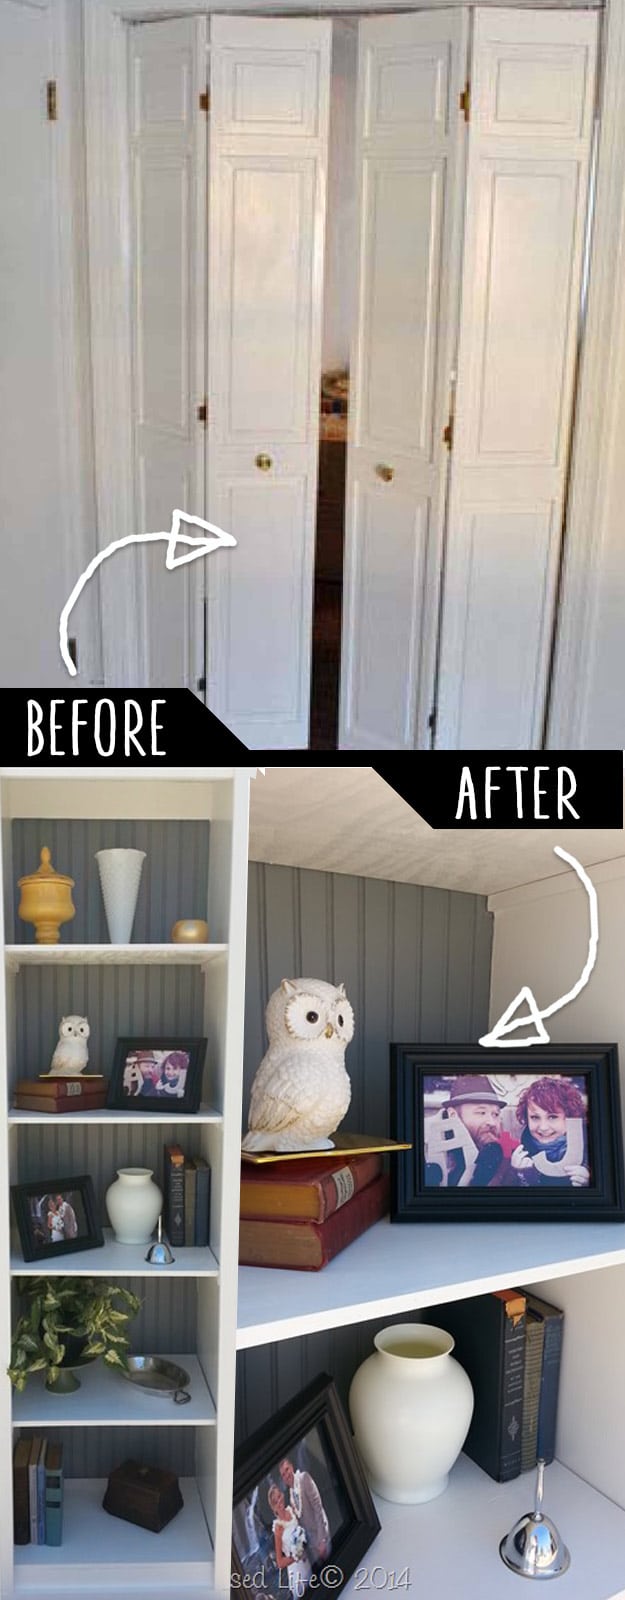
I recently picked up some retro 60s bi-fold doors I picked up recently at Habitat For Humanity. Because the weather has been so cold, I took them to the basement shop to transform them into a bookcase. I started by removing the hinges and adding 1×4’s to the top and bottom of the doors then I cut some shelves from plywood. Here I’m testing them out, trying to figure out the spacing using my clamps to hold the shelves in place and to make the doors look a little less like doors, I added some front facings. You can also see that I added the top and some trim. The shelving unit looked gorgeous when it was all done, so happy!
6. Entertainment Center into a TV Console Table
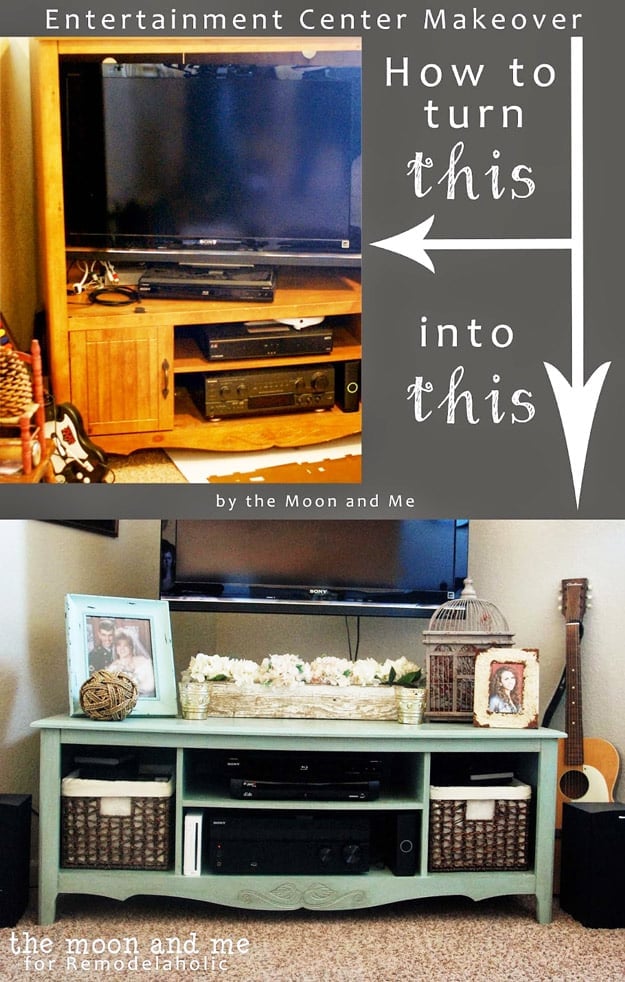
One big style that has changed in the last ten or so years is entertainment centers. With the invention of the thinner flat-screen TVs, those deep entertainment centers aren’t necessary anymore — something much thinner will work, or you can even hang your TV on the wall (and frame it as we did ;). So, that leaves lots of older style entertainment centers sitting around on curbs and in thrift stores. Which makes them the perfect DIY revamp candidates, of course. And our guest today made quick work of hers by removing the top and chopping it down to make it into a TV console table, perfect for holding your electronics beneath your wall-mounted TV:
7. Trash to Treasure Curb Side TV Transformation
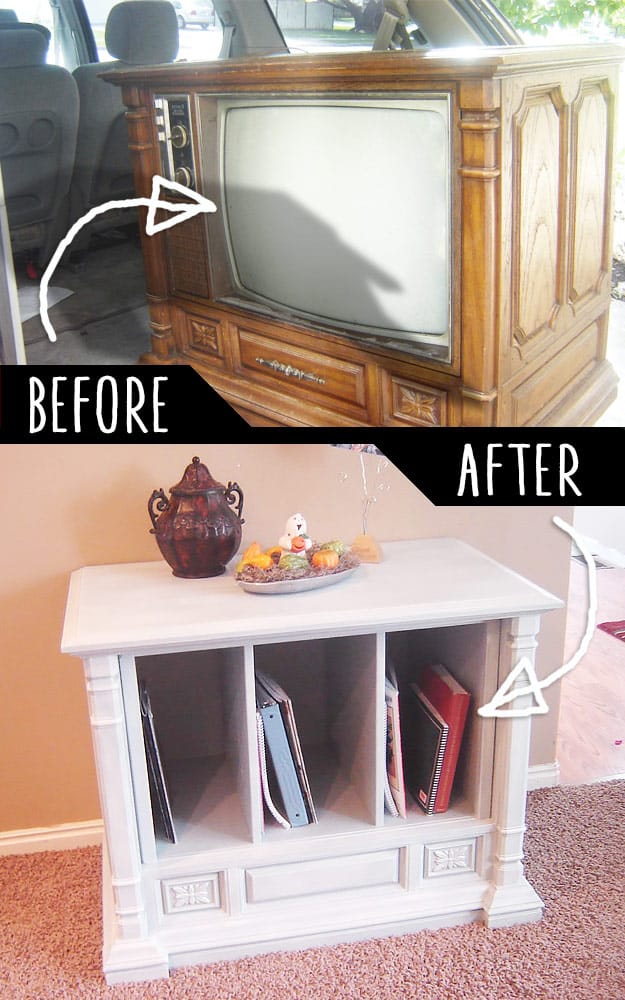
I saw an old TV in my neighbor’s yard the other day and my first impression was that someone had left their garbage in the front yard with the hope someone would take it. The box sat there for several days because who in their right mind would want THAT. It was an OLD TV. Like the kind I remember from when I was five. The kind you actually had to walk up to in order to turn the dial to change the channels. If you don’t have similar memories then you probably don’t have any wrinkles and you definitely don’t know how to rewind a record by picking up the needle and guesstimating the right ring on the record for the song you want. But I digress.
This TV was made back when you only needed 13 or 14 channels. Half of those channels didn’t even have a signal. I want to say that I wasn’t inspired by this old TV on the side of the road at first. I drove past it for several days without a second thought. But then I saw a TV transformation DIY project on Pinterest. It got my creative juices flowing. If she could do it, why couldn’t I?
9. Ladder Towel Rack
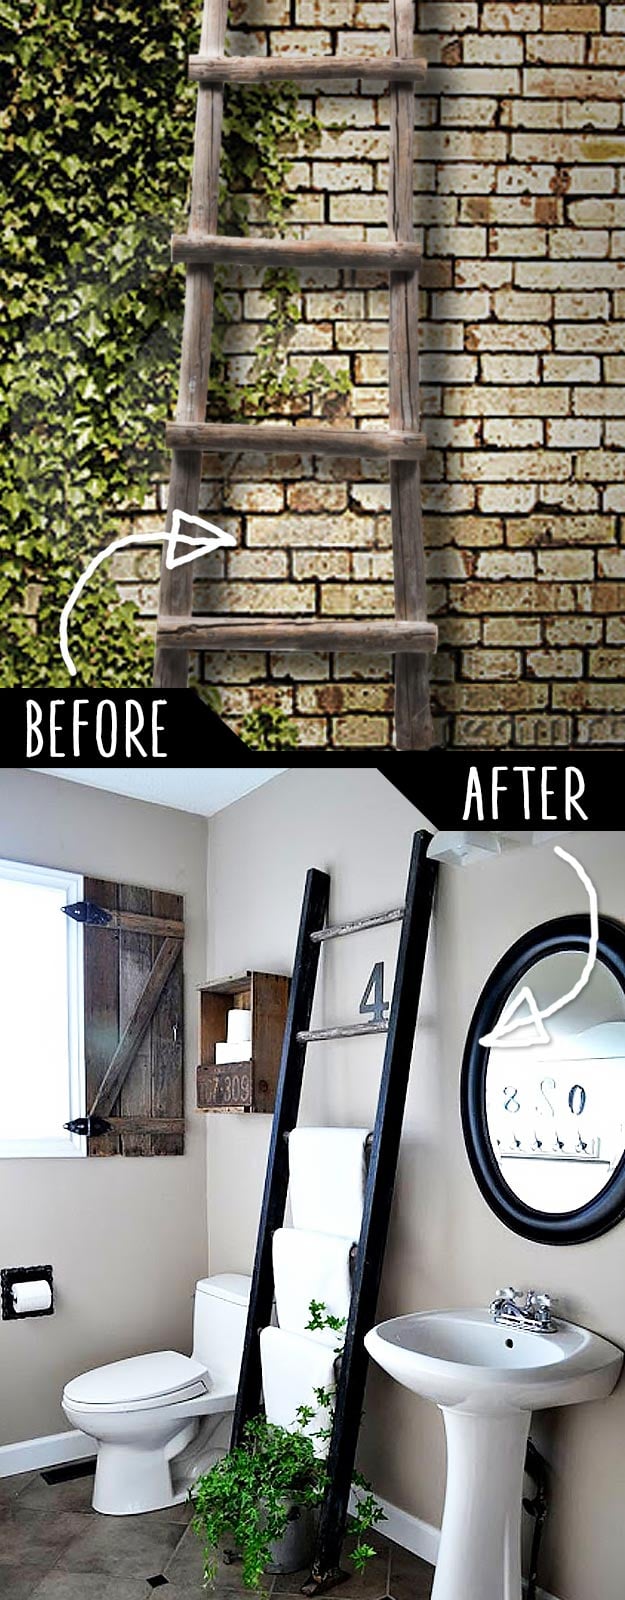
This old rustic ladder was in the garage when we bought the house and it somehow ended up in the bathroom. We started hanging our towels from it because it was there, in the way, so I thought. Then one day I realized there are no accidents and it stayed, making the best and the easiest DIY upcycled project I’ve ever made!
10. Old Unused Vase into an Adorable Table Lamp
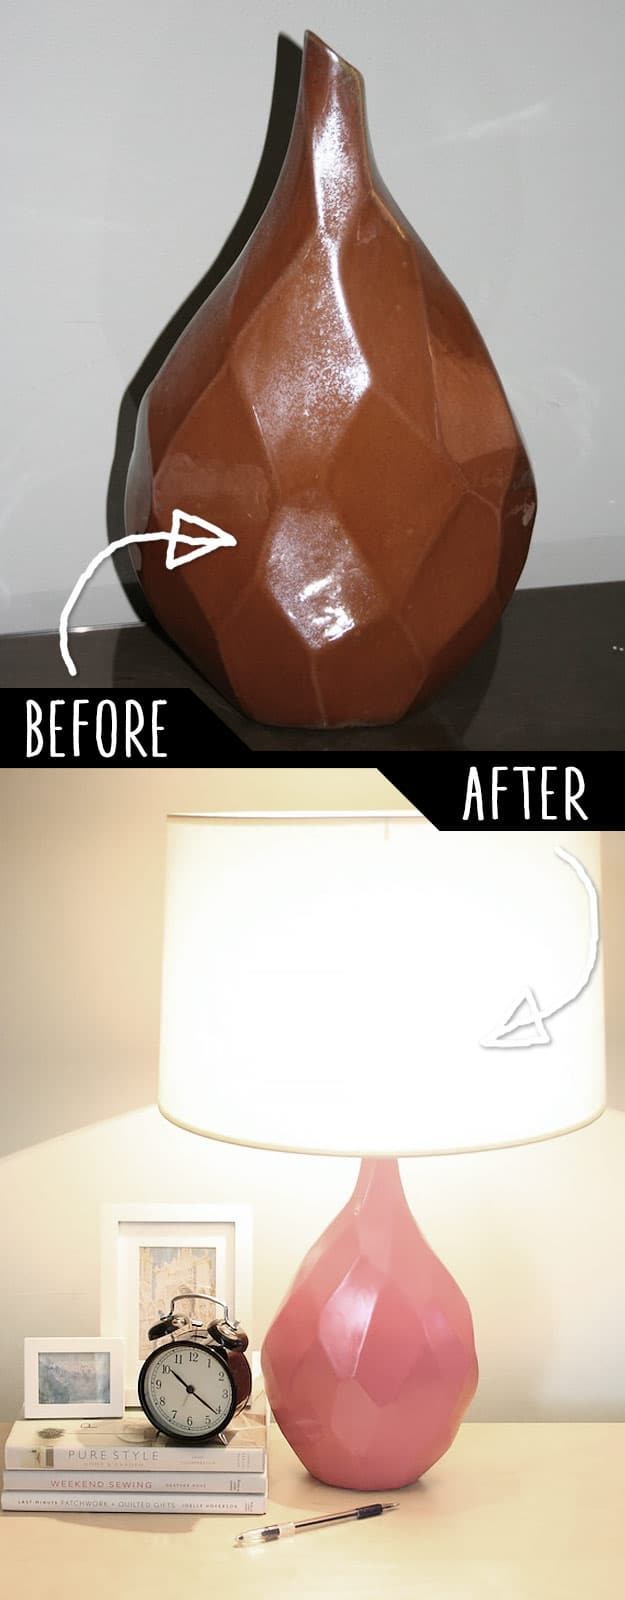
These beautiful faceted lamps come in a rainbow of candy-colored lacquer finishes, and its lines are very on trend. Its geometric shape isn’t alone on the marketplace, either. So when I found this angular vase that echoed the gemlike shape of the Delta lamp (and I saw the $10 price tag) I was inspired! I could take this yucky burnt orange iridescent vase and transform it into an oh-so-trendy jewel of a lamp.
I’d seen lamp kits at hardware stores and have since been scouring my local thrift stores for the perfect vase to transform into a lamp… this was my chance! I followed the simple instructions in this simple tutorial and the results were amazing! Everyone I know wants one.
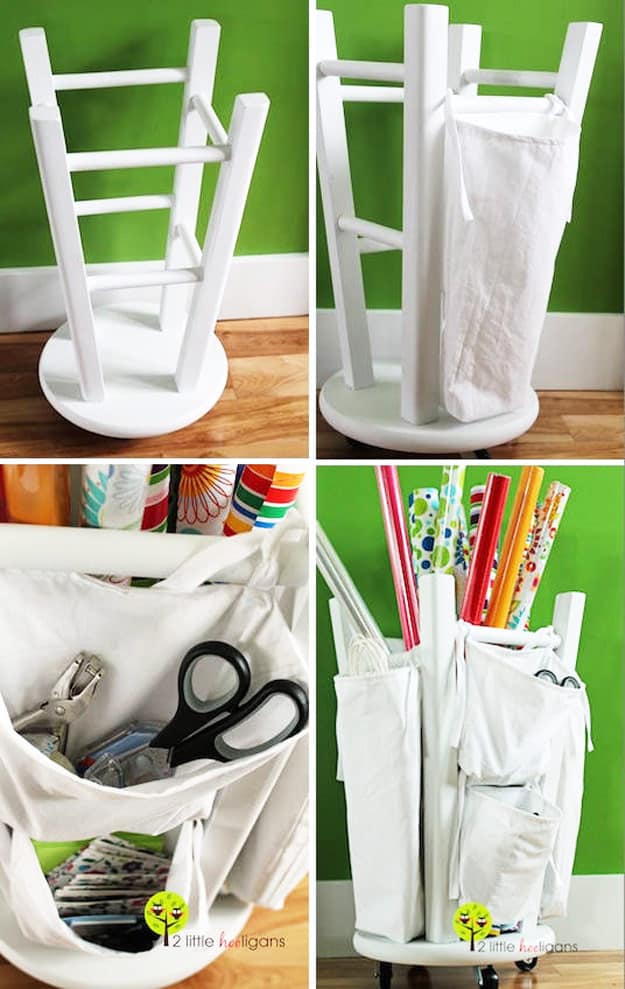
11. Wooden Stool into a Tool and Crafts Organizer
Love DIY Crafts? Follow me on Pinterest for more cool ideas!
12. Rustic Cooler Box from Pallets

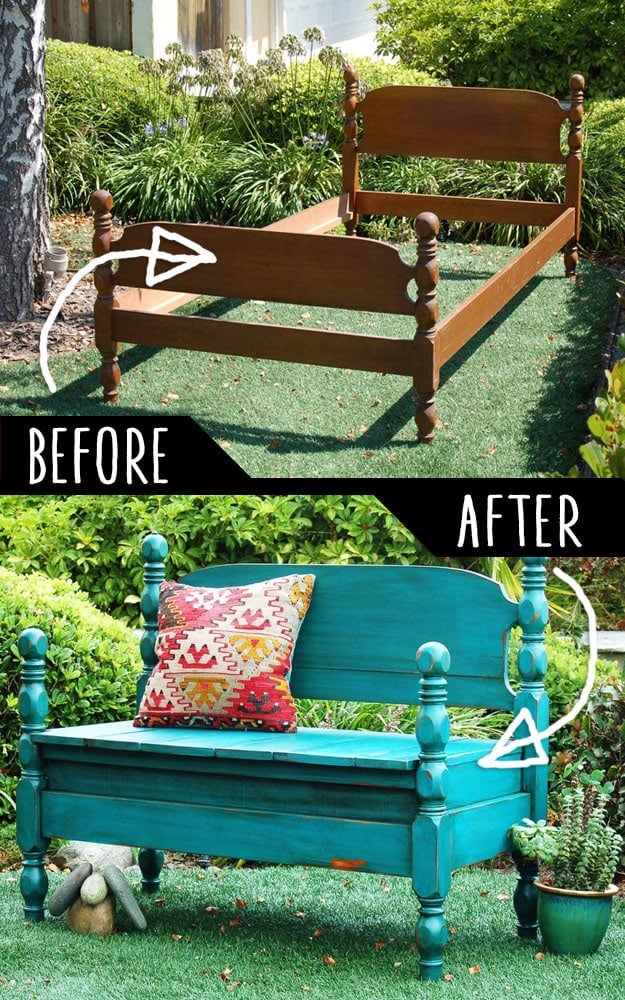
13. Bed Turned Into Bench
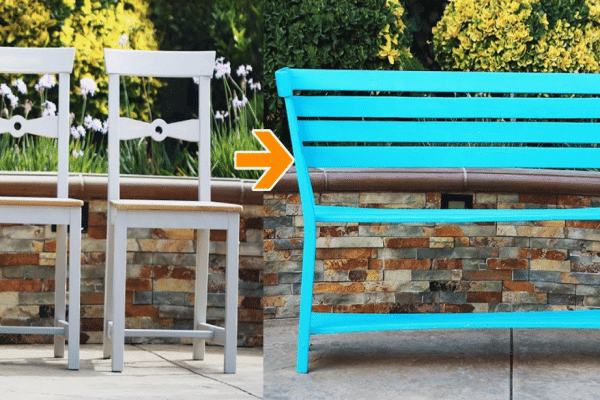
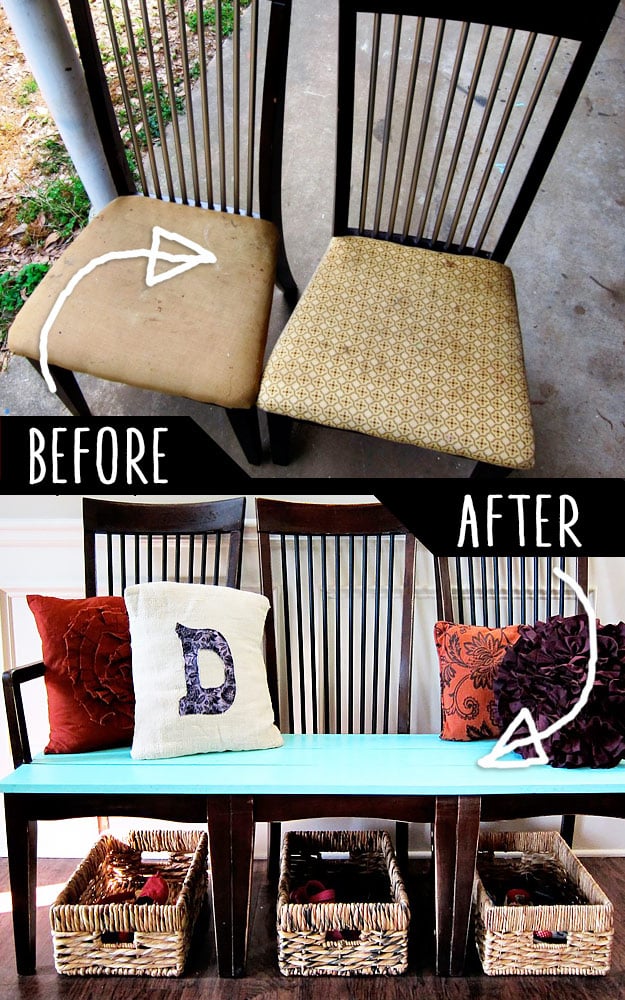
14. Old Kitchen Chairs Hack
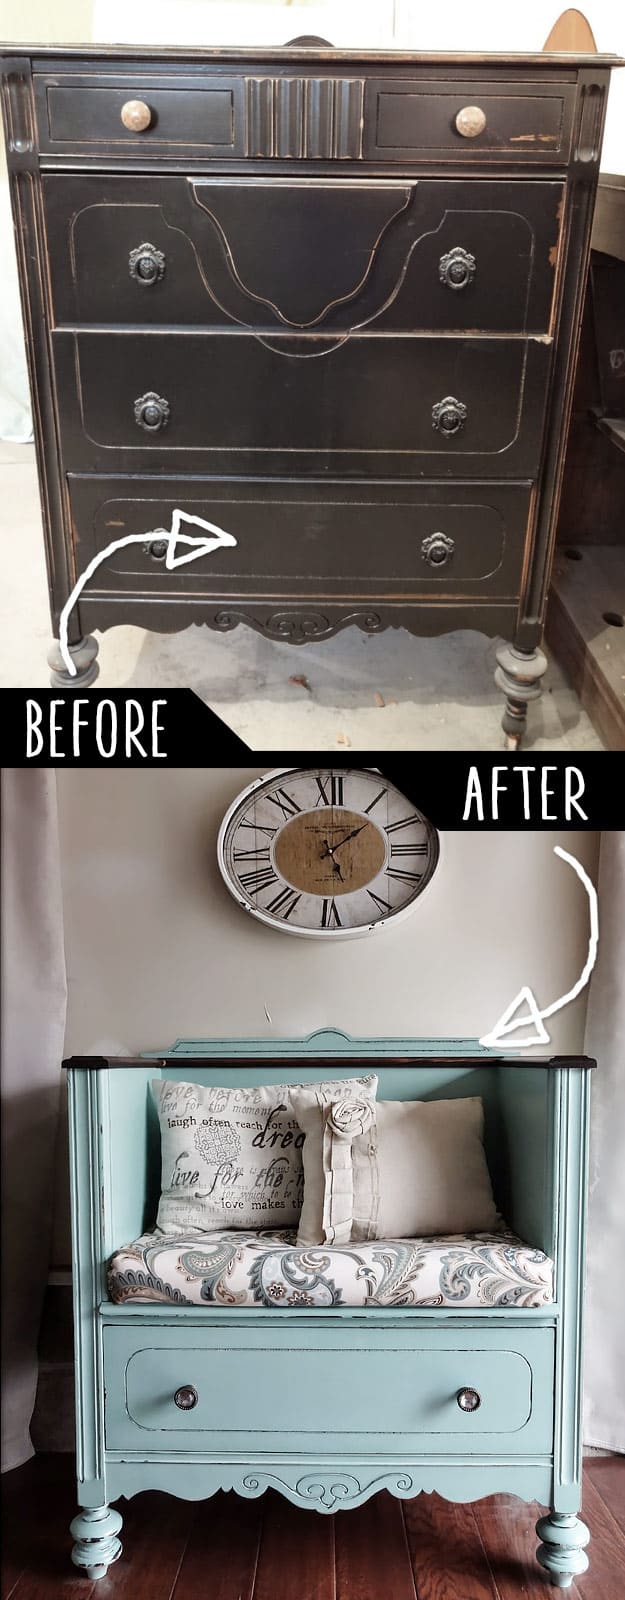
15. Unused Old Dresser Turned Bench
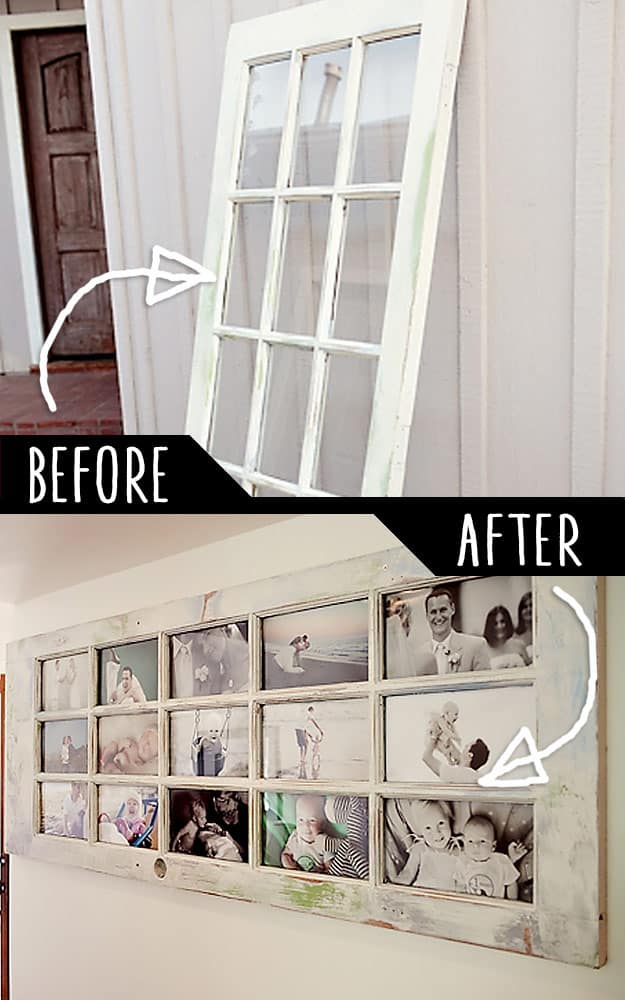
16. An Old Door into A Life Story
 .
.
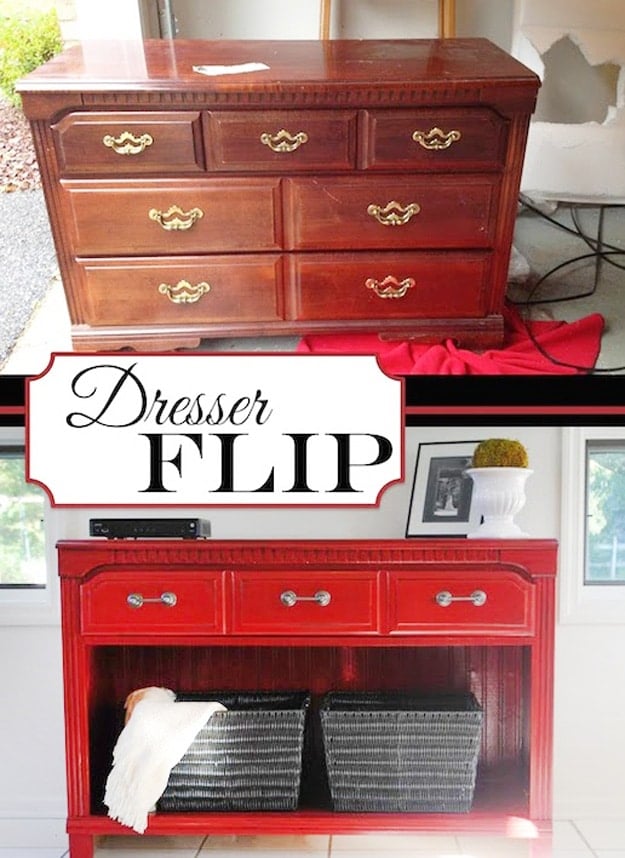
19. Dresser Flip
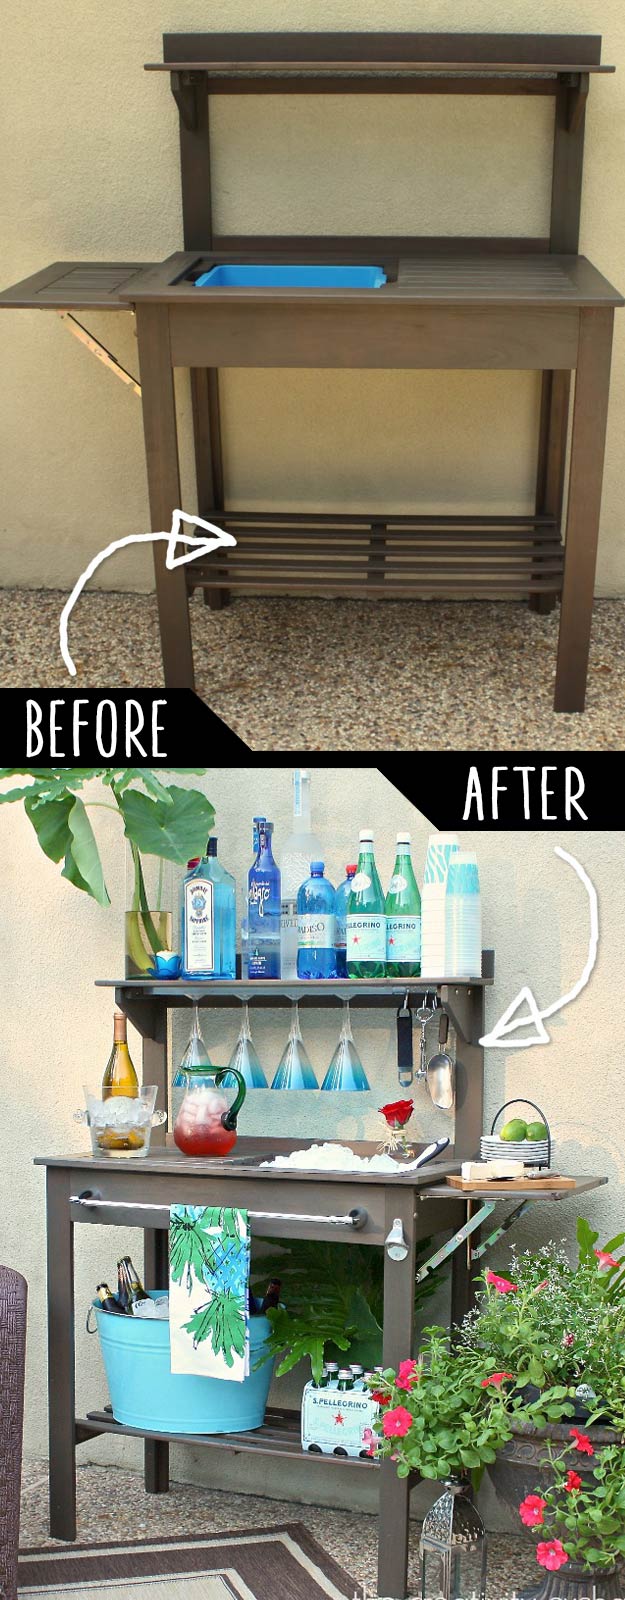
20. Potting Bench Turned Outdoor Bar
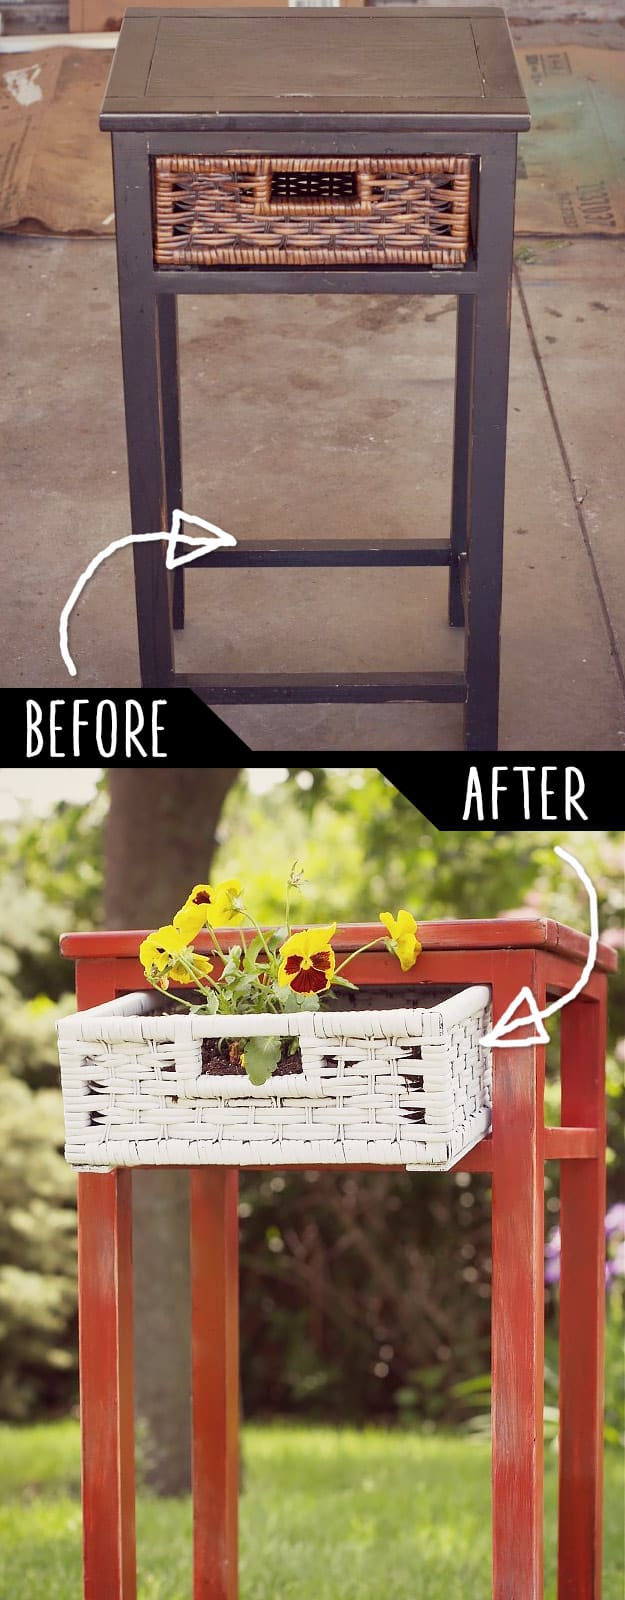
21. Upcycled Side Table into Planter
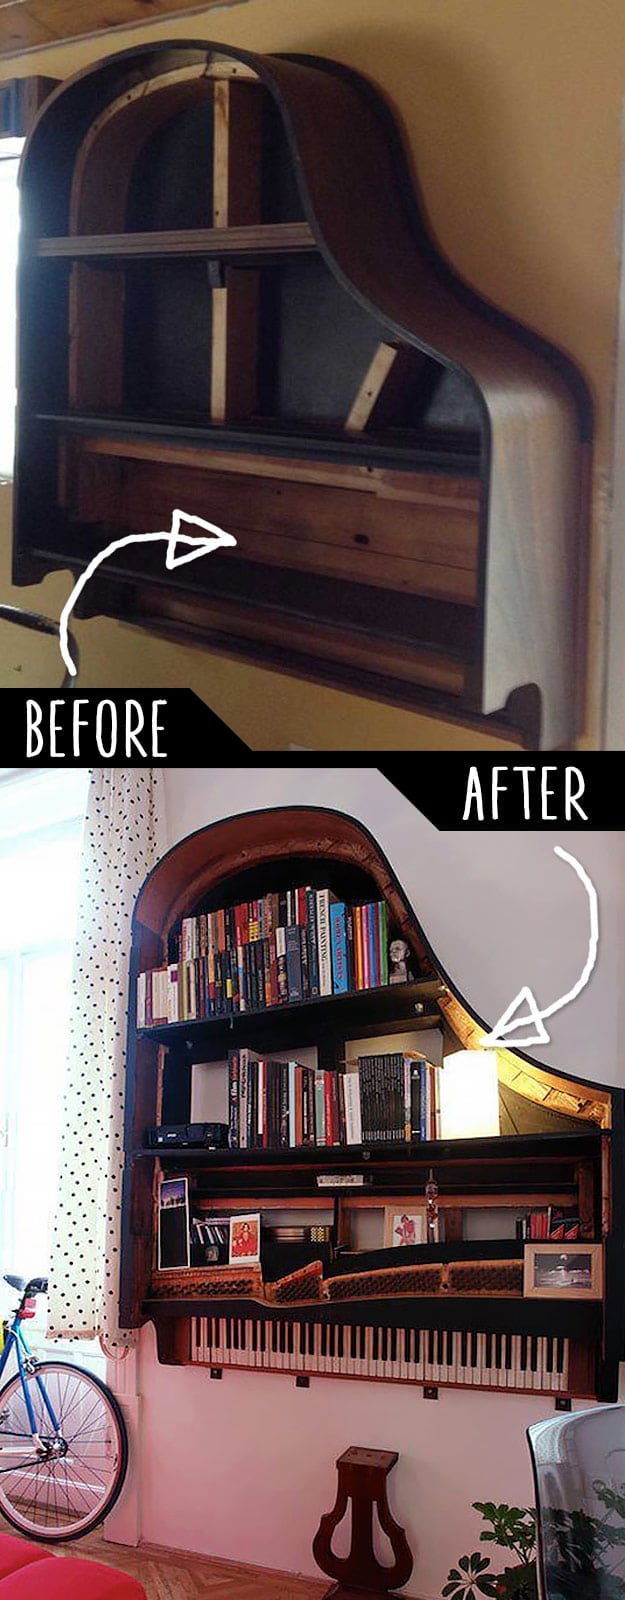
22. Grand Piano Bookshelf
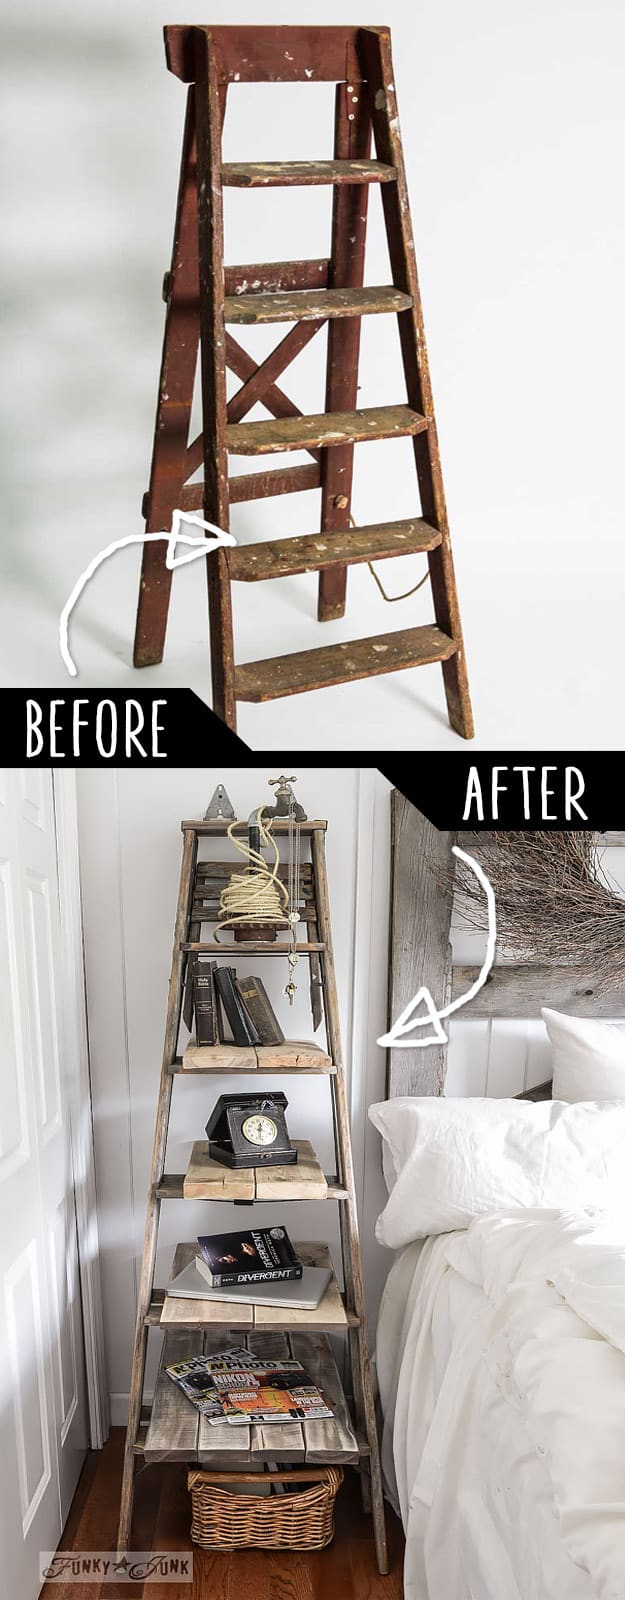
23. Step Ladder Side Table
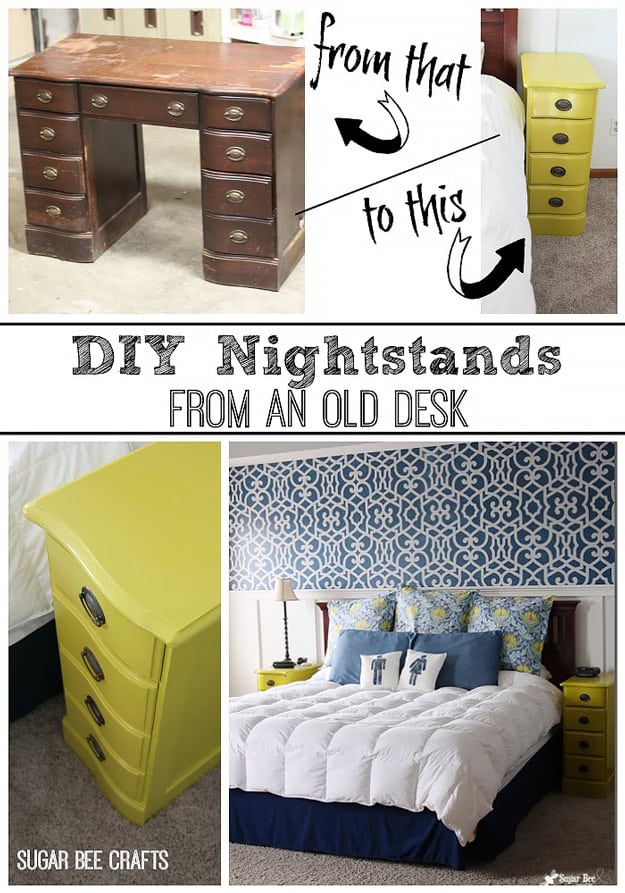
24. Night Stands from a Desk
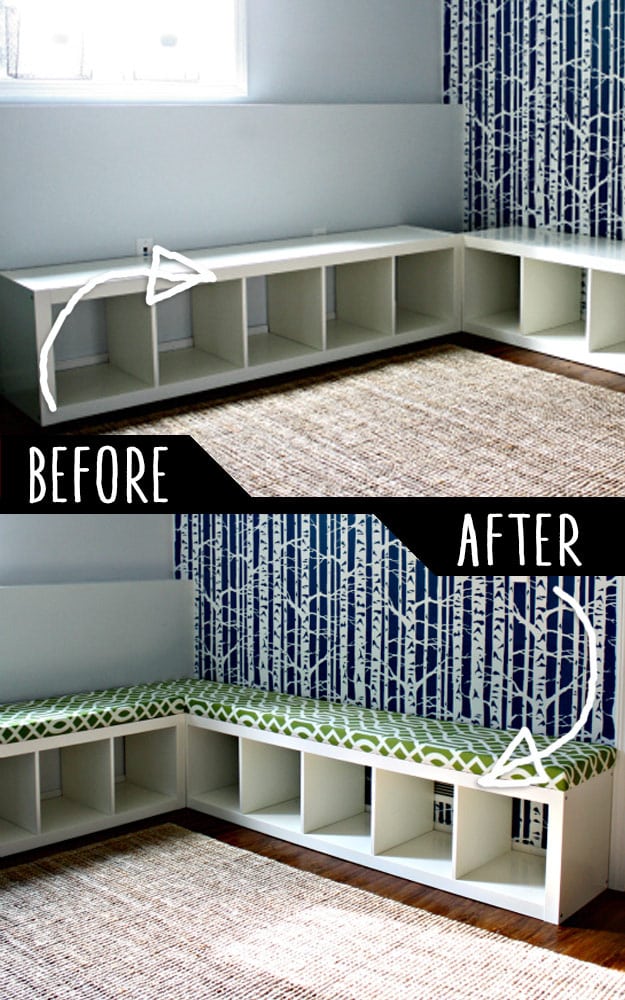
25. Padded Bench Out of Bookshelf
